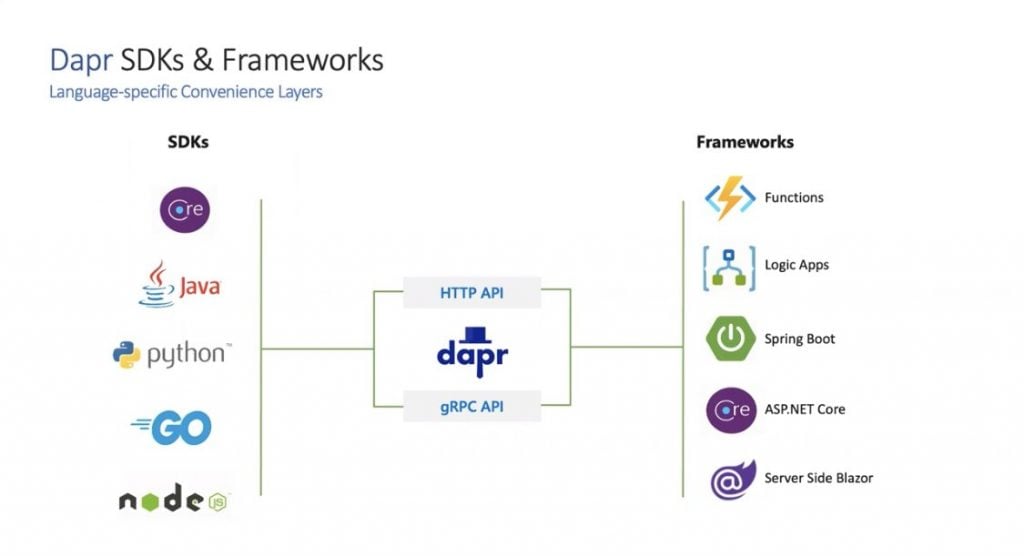
Hence a simple “Hello, World!” example in Python:
- Install DAPR: You can install DAPR on your development machine using the command-line tool by running the following command:
curl -sL https://raw.githubusercontent.com/dapr/cli/master/install/install.sh | /bin/bash- Create a microservice: Create a new Python file called
hello_world.pyand add the following code to it:
from flask import Flask
from dapr.clients import DaprClient

app = Flask(__name__)
dapr = DaprClient()

@app.route("/")
def hello():
    return "Hello, World!"

if __name__ == "__main__":
    dapr.set_port(3001)
    dapr.run()
This code creates a simple Flask-based microservice that listens on port 3001 and returns “Hello, World!” when accessed.
- Add DAPR components: Create a new file called
components.yamland add the following code to it:
apiVersion: dapr.io/v1alpha1
kind: Component
metadata:
  name: statestore
spec:
  type: state.redis
  metadata:
    - name: host
      value: localhost
    - name: port
      value: "6379"
This code defines a DAPR component for a Redis-based state store, which will be used to store and retrieve state across your microservices.
- Register the service with DAPR: Create a new file called
app.yamland add the following code to it:
apiVersion: dapr.io/v1alpha1
kind: App
metadata:
  name: hello-world
spec:
  components:
    - name: statestore
      componentName: statestore
  replicas: 1
  template:
    spec:
      containers:
        - name: hello-world
          image: python:3.9
          command: ["python", "hello_world.py"]
          ports:
            - name: http
              containerPort: 3001
This code defines the DAPR deployment for the “Hello, World!” microservice, including the Redis-based state store component, and specifies the number of replicas and the container image to be used.
- Deploy the service: To deploy the microservice, you can use the DAPR CLI by running the following command:
dapr run --app-id hello-world --components-path components.yaml --app-protocol http python hello_world.py- Interact with other microservices: Once your microservice is deployed, you can use DAPR’s built-in service discovery and load balancing features to easily discover and interact with other microservices in your application. For example, you can use the DaprClient class to call other services or you can use the pub-sub feature to publish and subscribe to events.
- Use state management: DAPR provides a simple key-value store for state management, you can use the DaprClient class to interact with the state store. For example, you can use the following methods to set, get and delete state:
dapr.state.set("key", {"data": "value"})
dapr.state.get("key")
dapr.state.delete("key")
You can also use the following method to get all keys in the state store:
dapr.state.get_all_keys()
- Use the pub-sub feature: DAPR’s pub-sub feature allows you to easily publish and subscribe to events in your application. You can use the following methods to publish and subscribe to events:
dapr.publish("topic", {"data": "value"})

@dapr.subscribe("topic")
def on_topic_message(topic, message):
    print(topic)
    print(message)
This is a basic example of how to use DAPR to build a microservices-based application. However, DAPR provides a lot more features to help you build your microservices like:
- Service invocation
- Actors
- Secrets
- Distributed tracing
- And more.
You can refer to the DAPR documentation to learn more about these features and how to use them in your application.

